Squid refers to proxy server software that performs the role of a cache and, among other functions, works as intermediate between a client and their web server. One of the most common uses of Squid caching is to improve a web server’s performance by caching requested content and thus reducing bandwidth usage, not forgetting that it supports features such as content filtering. Squid is widely used for speeding up web requests and controlling access to web resources in networks.
Let’s dive in to the steps.
Install squid server
sudo apt install squid
Configuration
Make a copy of original config file before editing
sudo cp /etc/squid/squid.conf /etc/squid/squid.conf.bak
Edit /etc/squid/squid.conf to add Access Control
Add below command at the bottom of TAG: acl section to allow the only the users within the below IP address cidr
acl fortytwo_network src 192.168.1.0/24
fortytwo_network is just a name replace it with your desired one
Then add the following to the top of TAG: http_access section
http_access allow fortytwo_network
You can uncomment #http_access allow localnet under TAG: http_access section If you’re setting proxy only for local computer, you can skip previous 2 steps if you’re doing so.
Save file and Restart server for the changes to take place
sudo systemctl restart squid.service
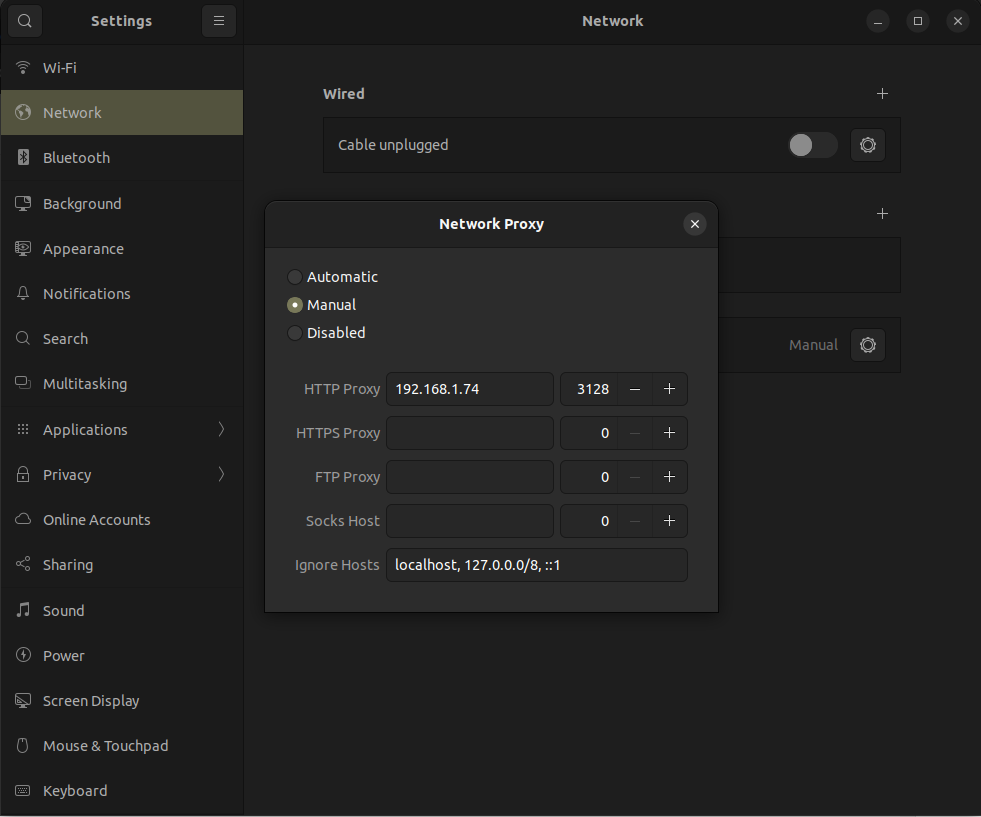
Now add Proxy ip address and port to computer settings manually

Enter your ip address and port number as shown, 3128 is the default port as we didn’t change it here.
Then check logs and try sending requests check if it goes through your proxy server
sudo tail -f /var/log/squid/access.log
If you’re successful you must see something like:
1704475800.047 30694 192.168.1.74 TCP_TUNNEL/200 30190 CONNECT example.com:443 - HIER_DIRECT/157.240.13.54 -
Visit Ubuntu Official Documentation on squid server for more advanced configurations.
We value your input. Share your thoughts or ask questions by leaving a comment.


